


")
Building a Brand Hub in Canva: Consistency Made Easy
You likely hear brand strategists (hi; I’m the problem; it’s me) and business gurus banging on about the importance of brand consistency ALL. THE. TIME.
But, truth be told, it can be ridiculously hard to remember exactly what size your headers are supposed to be or the exact line spacing to use when we’re all creating more content than ever and your business is growing at the speed of light. I totally get it. And I’ll be the first to say that my brand consistency is not always 100%. We’re all human, right?
But one of the things that has helped me stay on top of my own brand consistency is Canva. With the brand hub, this tool makes it super simple to keep your brand looking sharp and your assets all in one place.
Before we jump in, I do want to point out that this feature is only available for folks on the paid plan. If you’re still on the free version, no worries. Keep this information in your back pocket for when you’re ready to upgrade.
Getting Started with Canva
Unless you’re brand-spankin’ new to entrepreneurship or you’ve been living under a rock for while, you have likely heard of Canva, the drag-and-drop graphic design tool. For you newbies, think about it like an easier-to-navigate Adobe Illustrator. Not nearly as much functionality but way easier to navigate.
And that’s because it was created for the layperson (i.e., non graphic designers) to use to DIY their own content. Ahhhh, the democratization of design. We love it.
So, as I mentioned before, there are three primary pricing tiers within Canva – the free, pro, and teams. You get most of the features in the free version but you’ll miss out on some absolute bangers like premium templates and graphics, enhanced AI features, additional storage, and of course, the brand hub. In my opinion, the loss of the brand hub is the biggest drawback to the free plan. But of course, use your own best judgment as to what makes the most sense for your business right now.
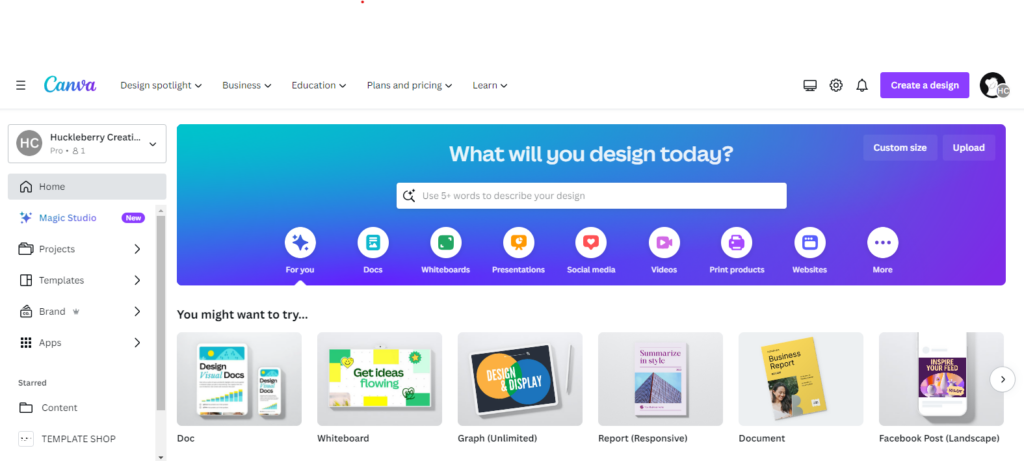
Once you’ve snagged a plan, you’re ready to log in and head to the dashboard, where you can access aforementioned templates, organize your designs in project folders, and create new designs at will.
Understanding the Canva Brand Hub
On the left-hand side of your screen, you’ll see a handy dandy menu. Projects. Templates. Brand. That last one – that’s where we’re hanging out today.
Inside the brand hub, you’ll see a different menu on the left that allows you to access the three components of the hub: brand kit, brand templates, and brand controls. We’ll spend the most time discussing the first one as it’s the most robust, but we’ll touch on the others, as well.
Before we dig into the logistics of using this tool, let’s pause for a moment to talk about why the brand hub is important and why you should take the time to set one up. The answer is simple: brand consistency. While it will take an hour or so of your time to set up a Canva brand hub, once you do, the hours it will save you are countless. You’ll never again have to second-guess a color’s HEX code or wonder if you’re using the right version of a logo on your new freebie. The brand hub has you covered.
The Brand Kit: Setting Up Your Digital Style Guide
The brand kit is essentially Canva’s version of a brand style guide. Once you get in there, you’ll see there’s places for your logos, color palette, fonts, brand voice, photos, graphics, and icons. Essentially everything you could ever need to create your on-brand content.

Did you know you can even create more than one brand kit??? This is an awesome feature if you have more than one business or several separately-branded offers. Go ahead and get consistent with your empire!
Now, let’s customize your brand hub:
- Upload your logo suite. So, first things first, we’re going to want to upload all of your logos into Canva. You can drag and drop them all at one time, though if you have a larger logo suite it may take a second to get them all in there. Pro recommendation: upload the PNG version of your logos (the ones without a background) as they will be sooooo much easier to use on top of images, different colors, etc.
- Add in your color palette. A fun, though potentially confusing, aspect of the brand hub is that you can create and name as many color palettes within your brand hub as you want. This is super helpful for me as a designer because I can load in my clients’ color palettes without having to create an entirely new brand. I also use it when I’m creating graphics for my templates. For most businesses, though, one color palette should be enough. Remember, the goal is to keep things consistent.
- Next up, identify your brand fonts. This is another area where it’s easy to go overboard and confuse yourself. Don’t add in extra fonts just because there’s room to. Stick with your core brand fonts, and know that you can always search for additional fonts in your designs (if there’s a strategic reason to!). Canva comes replete with a large stock of free, mainly Google fonts (if you’re on a free plan), and a handful of nifty premium fonts (if you’re on a paid plan). Still, not every single font you might need is in Canva natively, so as long as you have the correct license, you can upload your custom brand fonts here. You’ll even be able to design what size font you want to use for different settings (headers, body, quotes, etc.) as well as bold or italicized styling.
- Teach Magic Write your brand voice. A recently added feature of the brand hub is the brand voice section that allows you to describe (in 500 characters or less) your brand voice. Taking this step in your brand hub will help make sure that, if you decide to use any of the AI-enabled Magic Write features sprinkled throughout the tool, the content generated will be on brand.
- Upload your brand photos. The photos section is where you’ll want to add any photos of you or your team that you will regularly want to pull into your designs. Don’t worry, you’ll still have access to Canva’s free stock photos, too. But this feature makes it much easier to find your brand photos when you need them.
- Keep brand graphics in one place. If you’ve paid to have your branding designed or even if you’re DIYing it, you likely have a handful of brand graphics that would be helpful to have on hand. Think about things like illustrations, patterns, signatures, taglines, etc. Grab them all and upload them here.
- Compile your icons. Finally, if you have custom icons for your brand, you can load them in here. This section for me is a little bit redundant to the previous section, but if you have a ton of custom brand graphics, it might be helpful to have this separate icon section. Or, if you’re like me, you can go rogue and upload something else in place of icons like curated stock photos you commonly use; that’s what I did.
Brand Templates: Never Recreate the Wheel Again
The next section in your brand hub revolves around your brand templates. Why should you create brand templates? Simple – because it allows you to easily find and use your branded designs over and over again without having to recreate them.

Brand Controls: Keeping Everyone on Brand
This feature of the Canva brand hub will be most useful for you if you have a team or a bunch of contractors working in your Canva account to create content.
In this section of your brand hub, you can restrict your team to only using your brand colors and fonts. You can even disable the addition of text effects, if you need to. Plus, there’s a toggle in there that lets team members get their designs approved by a specific team member before publishing.
While these controls may be unnecessary for some, those with larger teams or contingents of contractors may find it helpful to have a bit more governance over specific brand elements like these.

Accessing your brand in your designs
When you’re ready to start using your newly set up brand, you can access it in a couple of different ways.
- You can access your brand hub from your main dashboard. Just click on the “Brand Hub” link in the left menu.
- Alternatively, you can access everything you’ve set up in each of your designs. Again, just go to the black menu on the left and click on “Brand.” There, you’ll see every brand asset from your colors to your fonts and photos. Find what you need and add it to your design.

Maintaining and Updating Your Brand Kit
Apart from just setting up your brand kit, it’s important to keep it up to date as you make upgrades and adjustments to your brand. I’m not advocating for regular, unstrategic tweaks, but if you have intentional shifts in your branding, make sure they are reflected here.
Swapped out a brand font? Make sure you do so in your Canva brand hub, too.
Added a new offer with its own branding? Upload the color palette and logos.
Got some new brand photos taken? Purge the old ones and upload the new.
The Bottom Line: Protect Your Brand Identity
And there you have it, the ins and outs of building a brand hub in Canva.
Let’s face it, we’re not robots programmed for perfect consistency. There are days when even remembering our own phone number seems like a Herculean task, let alone the specifics of our brand guidelines. But that’s where tools like Canva come in clutch.
It’s like having a personal assistant who never sleeps, always remembers your preferences, and keeps everything organized. This tool becomes the guardian of your brand’s identity, ensuring every piece of content you create, from social media posts to marketing brochures, aligns with your brand’s look and feel. No more guesswork or frantic searching through folders for that specific shade of blue or the right font.
Remember, consistency in branding isn’t just about looking pretty; it’s about building trust and recognition. When your audience sees the same colors, fonts, and style across all your platforms, they start to feel like they know you. And in the world of business, familiarity breeds trust, and trust leads to loyalty.


")
